On switching from Adobe Premiere to DaVinci Resolve
It's worth it.


If you've been thinking about trying out DaVinci Resolve, the answer is "yes."
If, like me, you've scoured Reddit threads trying to ascertain if the switch is worth it, the answer is, "yes."
If you’re thinking about getting into video editing and you’re wondering if Resolve is a good place to start with and continue, the answer is “yes.”
I've been in the Adobe ecosystem for a minute. I first learned InDesign circa 2016 and over the years I've worked my way through the other applications, with an emphasis on Premiere and Lightroom. The Adobe ecosystem is tight, and the products are industry-standard, but I've been feeling the itch to try alternatives. The reasons for this are many-fold:
- The cost of an Adobe subscription. $700/yr is steep when Canva just released the latest version of Affinity for free.
- Working at a church (a non-profit), where I learned to look for ways to cut software costs.
- Working at a roofing company where I can make 90% of what I need in Canva. I haven't really had to open anything except Premiere and Lightroom for the past 6 months aside from a brief excursion into Illustrator to export a new color variation of our logo.
- Observing DHH's journey away from Mac to Linux which showed me that you can simply drop the tools that you're familiar with and pick up new ones cold turkey and be pleasantly surprised at the results.
The path to the switch
It started with a meme
Seriously, that planted a seed in my brain about Resolve being a viable alternative to Premiere.
Getting more versed with color correction
While I worked at Grace Church, my friend Dan taught me a ton about color and lighting. At the same time, my friend Zach taught me a lot about photo editing. Both of those guys are absolute pros and helped me understand lots of things about imaging beyond simply rolling up and shooting great content.
Over time, I started working the things I learned from them into my photo editing. I started using curves (which I had avoided) and also dialing things in with HSL sliders in Lightroom (which was essential for some of complex lighting environments in the church auditorium). My images started to take a new form, and I began to gain a new appreciation for how to sculpt an image into something beautiful and striking. I started seeing new possibilities for RAW images and Log footage, and I wanted to push things more.
File management and checksums
I stumbled across a great resource from Frame.io on video post production workflow, that opened my eyes to the intricacies of a proper process. I've always been a solo video creator, and my approach was, admittedly, homegrown. Rooting through the guide gave me a new appreciation for video file management, which had already been a friction point for previous projects.
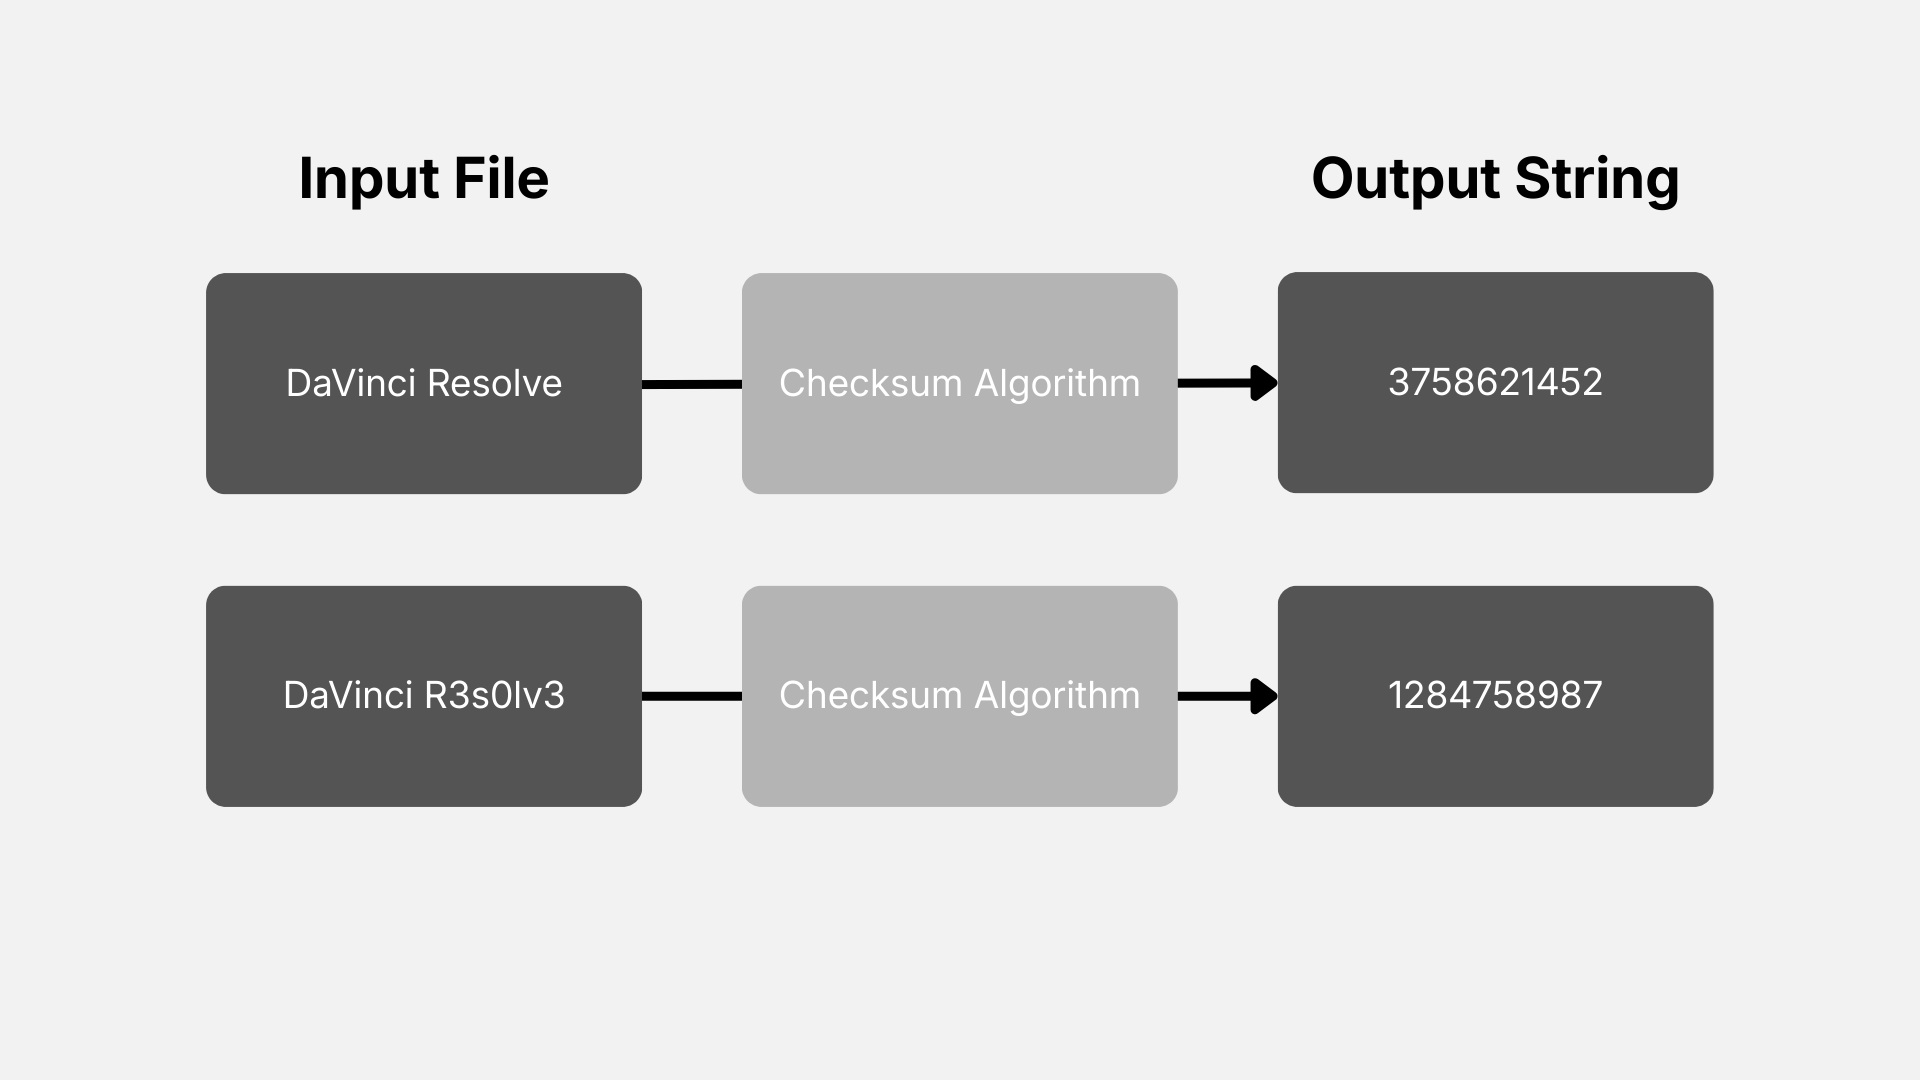
One thing that really opened my eyes was the explanation of why checksums should be used when transferring video files. In short, checksums essentially create a unique numerical fingerprint for every single file in the transfer, and then it uses that fingerprint to check the copy against the original to ensure that everything transferred perfectly. If you're just dragging and dropping video files in your file manager, there's always a chance of data corruption. The original and the copy might look like they have the exact same size, but if a few bits are off, the copied footage could be completely unusable.
I immediately wanted to build checksums into my workflow, and I tried to do so with a command line tool called rsync. I wanted to generate checksums and copy video footage to two different hard drives so I have a working drive and a back up, but the whole process became messy and convoluted, and I was concerned about overwriting data on my drives.
I learned that many pro studios will use tools like Hedge or Shotput Pro to manage file transfers, but I was trying to avoid paying for yet another subscription, which is why I was trying to make things work with rsync. I also heavily considered Carbon Copy Cloner, but again, I was trying to avoid buying software if I didn't have to.
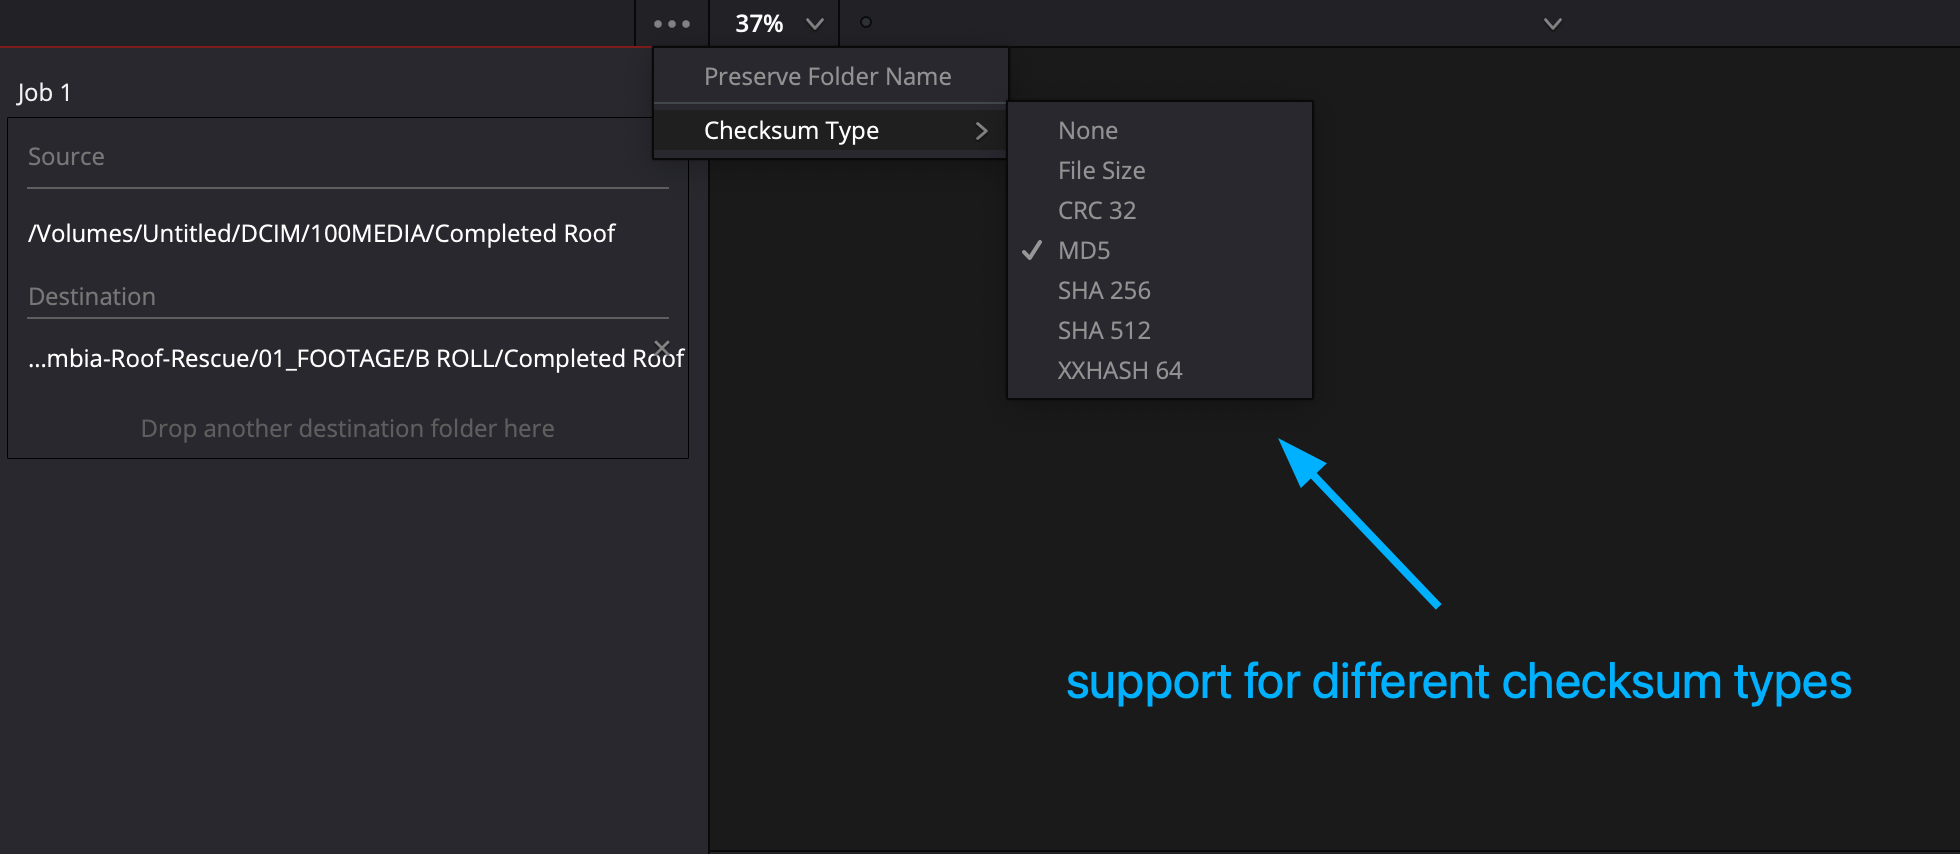
I discovered that DaVinci Resolve has a built in clone tool that can copy files straight from an SD card or hard drive to multiple drives and generate and validate checksums in a variety of formats including md5, SHA265, and SHA512. It was a no brainer to use something that's already built-in to a readily available tool for video editing versus buying something else—regardless of how many Reddit threads extolled the wonders of Hedge and Shotput Pro.
The real breaking point: too many workspaces and UI nonsense in Adobe Premiere Pro
I've edited many videos in Premiere. I've watched lots of tutorials, especially the excellent ones from Valentina Vee, which are absolutely top-notch in terms of instructional design. She is an amazing teacher, and her tutorials make everything super simple and practical.
But several months ago, I shot a simple two camera interview with our CEO I ran a lav mic on one camera and a shotgun as a safety net on the other. I edited the videos as I normally would, but I ended up with some really challenging footage in the B Cam. I severely underexposed the background so I wouldn't have clipped highlights, but the resulting footage was extremely difficult to color correct and grade.
Of course, the best way to get a great shot in post is to dial in your settings on the shoot. I made a technical choice that I thought would be good for post, but it ended up being a big headache in the workflow. A big part of that is my fault, but Premiere is limited in how far you can push an image.
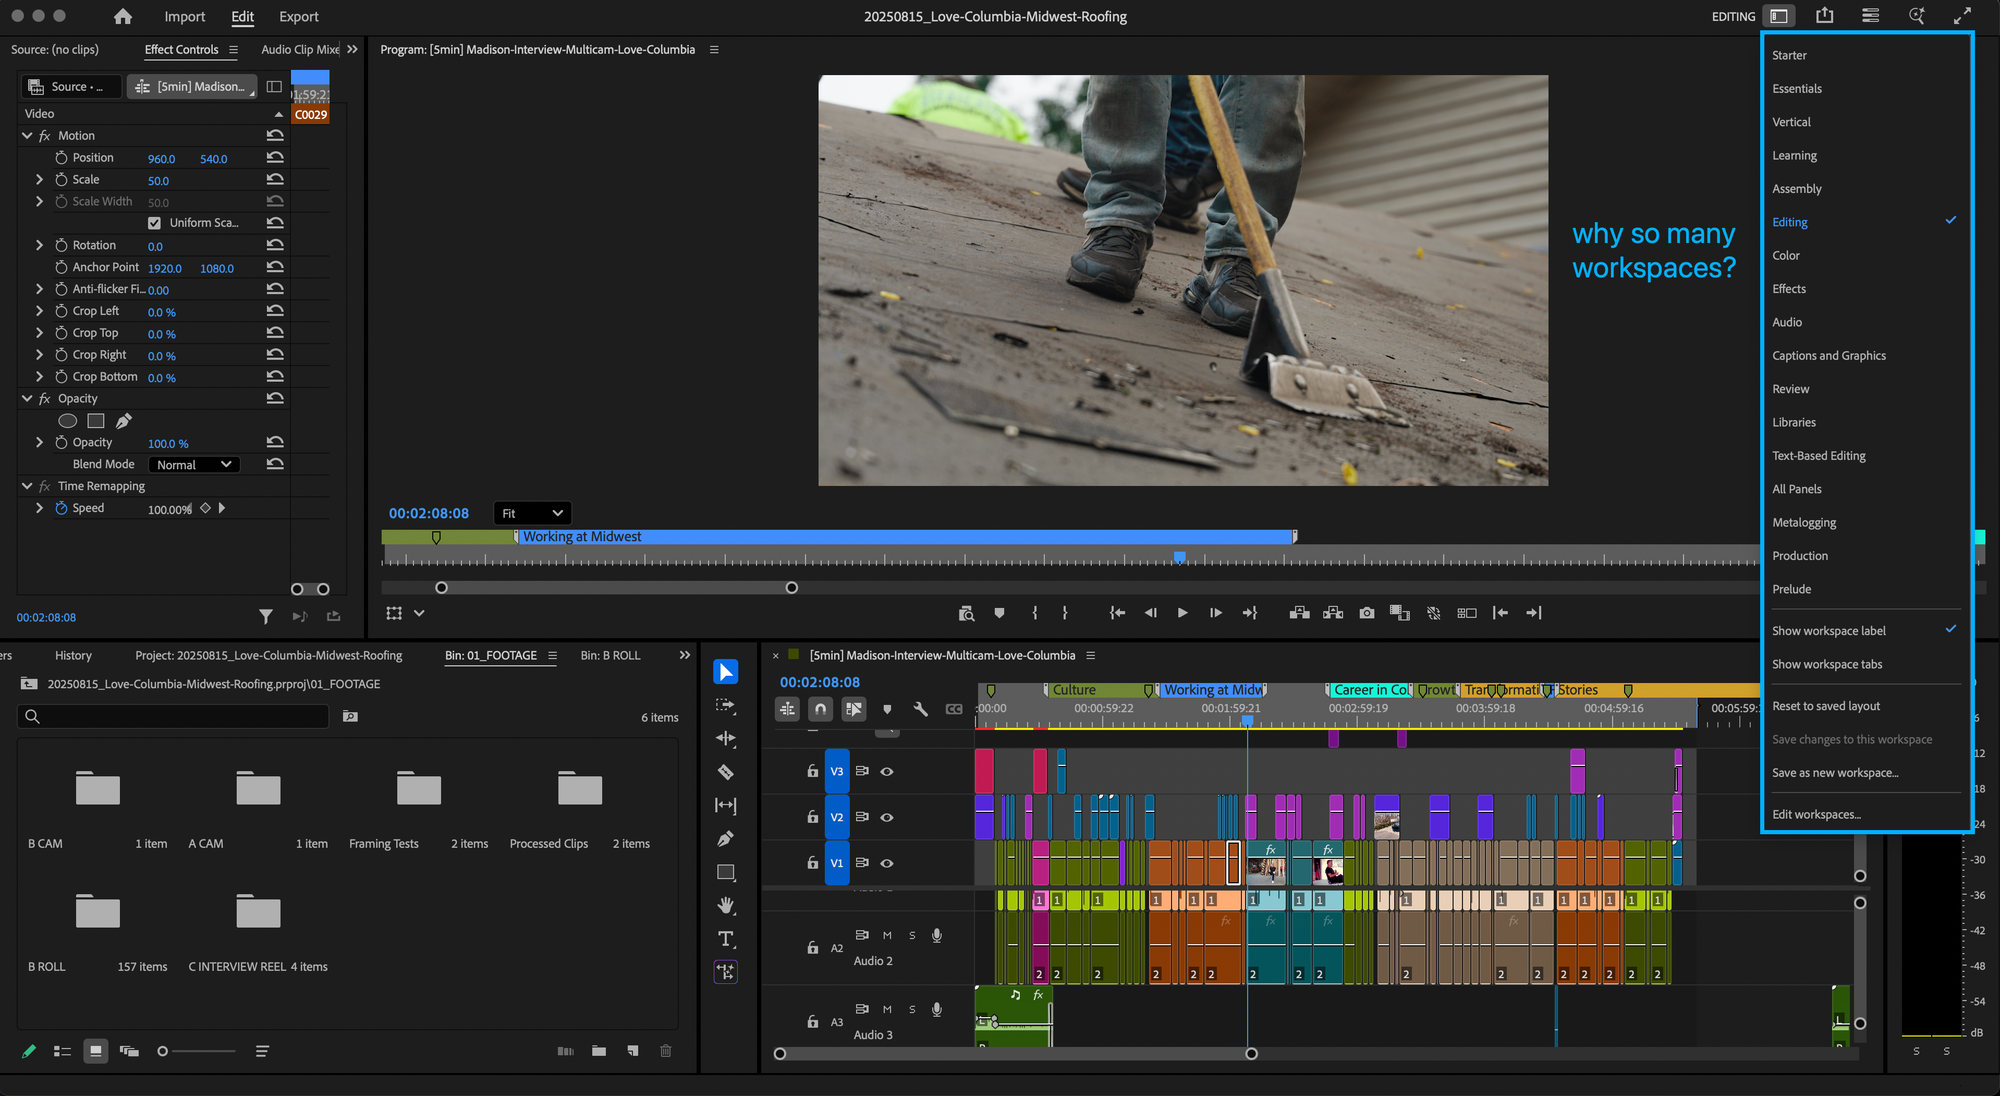
But what really drove me crazy was the back and forth between the different workspaces in Premiere. Video editing does have a flow to it, but it's not uncommon to switch between editing, color correcting, and audio while cleaning up a cut on the timeline. I felt like I was constantly having to go into the Workspaces menu, pick the space I wanted, and drag panels like a Neanderthal just to adjust the layout for the task at hand. It felt like having to clean off my workbench every five minutes instead of achieving flow.
Then there's the matter of playback and rendering the sequence. In this instance, I did not use proxies, partly because I had never needed them before, but also because it felt like another thing to manage in the project. You might be thinking, "Well, you should have taken just 15 minutes to learn a proxy workflow." You're probably right, but I was just trying to crank the thing out, and I was OK clicking "Render In to Out" a gazillion times and playing things back in 1/2 or 1/4 quality to get the edit done.
Even with the effort to achieve smooth playback, it did seem like Premiere would get bogged down easily. To be fair, I was working with 4K 4:2:2 10bit footage, but I'm also running an M3 Mac with 32GB of RAM.
It made me feel like that meme was telling the truth.
Making the decision
By this point, I had scoured enough Reddit threads to know that the jury was out on whether the switch would be worth it, but I had enough friction/frustration with Premiere to feel like I should give Resolve a try.
I had another major video project on deck with a hard and looming deadline, which is an amazing time to start learning an unfamiliar piece of software. It's sink or swim. I decided to jump into Resolve to see how things would go, and I told myself it would be a learning opportunity.
If I liked Resolve and the project went pretty smoothly, I'd seriously look at burning our Adobe subscription. If the project was a nightmare, it would confirm that I should stay with Premiere and dial in my workflow there.
Ultimately, I felt like it was a pretty low-risk decision. DaVinci Resolve is free, and it costs a one-time $295 to get a license to the Studio version, which includes key features like AI transcription and the ability to import H.264 material (which I needed for this project).
I bought the studio version and got to work importing footage and fumbling my way through the tutorials. Even though I was trying to avoid buying software, this felt like it had the potential to save money long term. I decided that if at any point the deadline seemed in jeopardy, I'd jump ship back to Premiere and pick Resolve up for other projects.
But it turns out that I took to Resolve pretty easily and the program actually made the deadline more achievable.
Impressions of Resolve
It didn't take long for me to get comfortable with Resolve. There are a few shortcuts that are different from Premiere, but they're pretty easy to get accustomed to. Plus, it's easy to map new custom keyboard shortcuts to make yourself feel right at home.
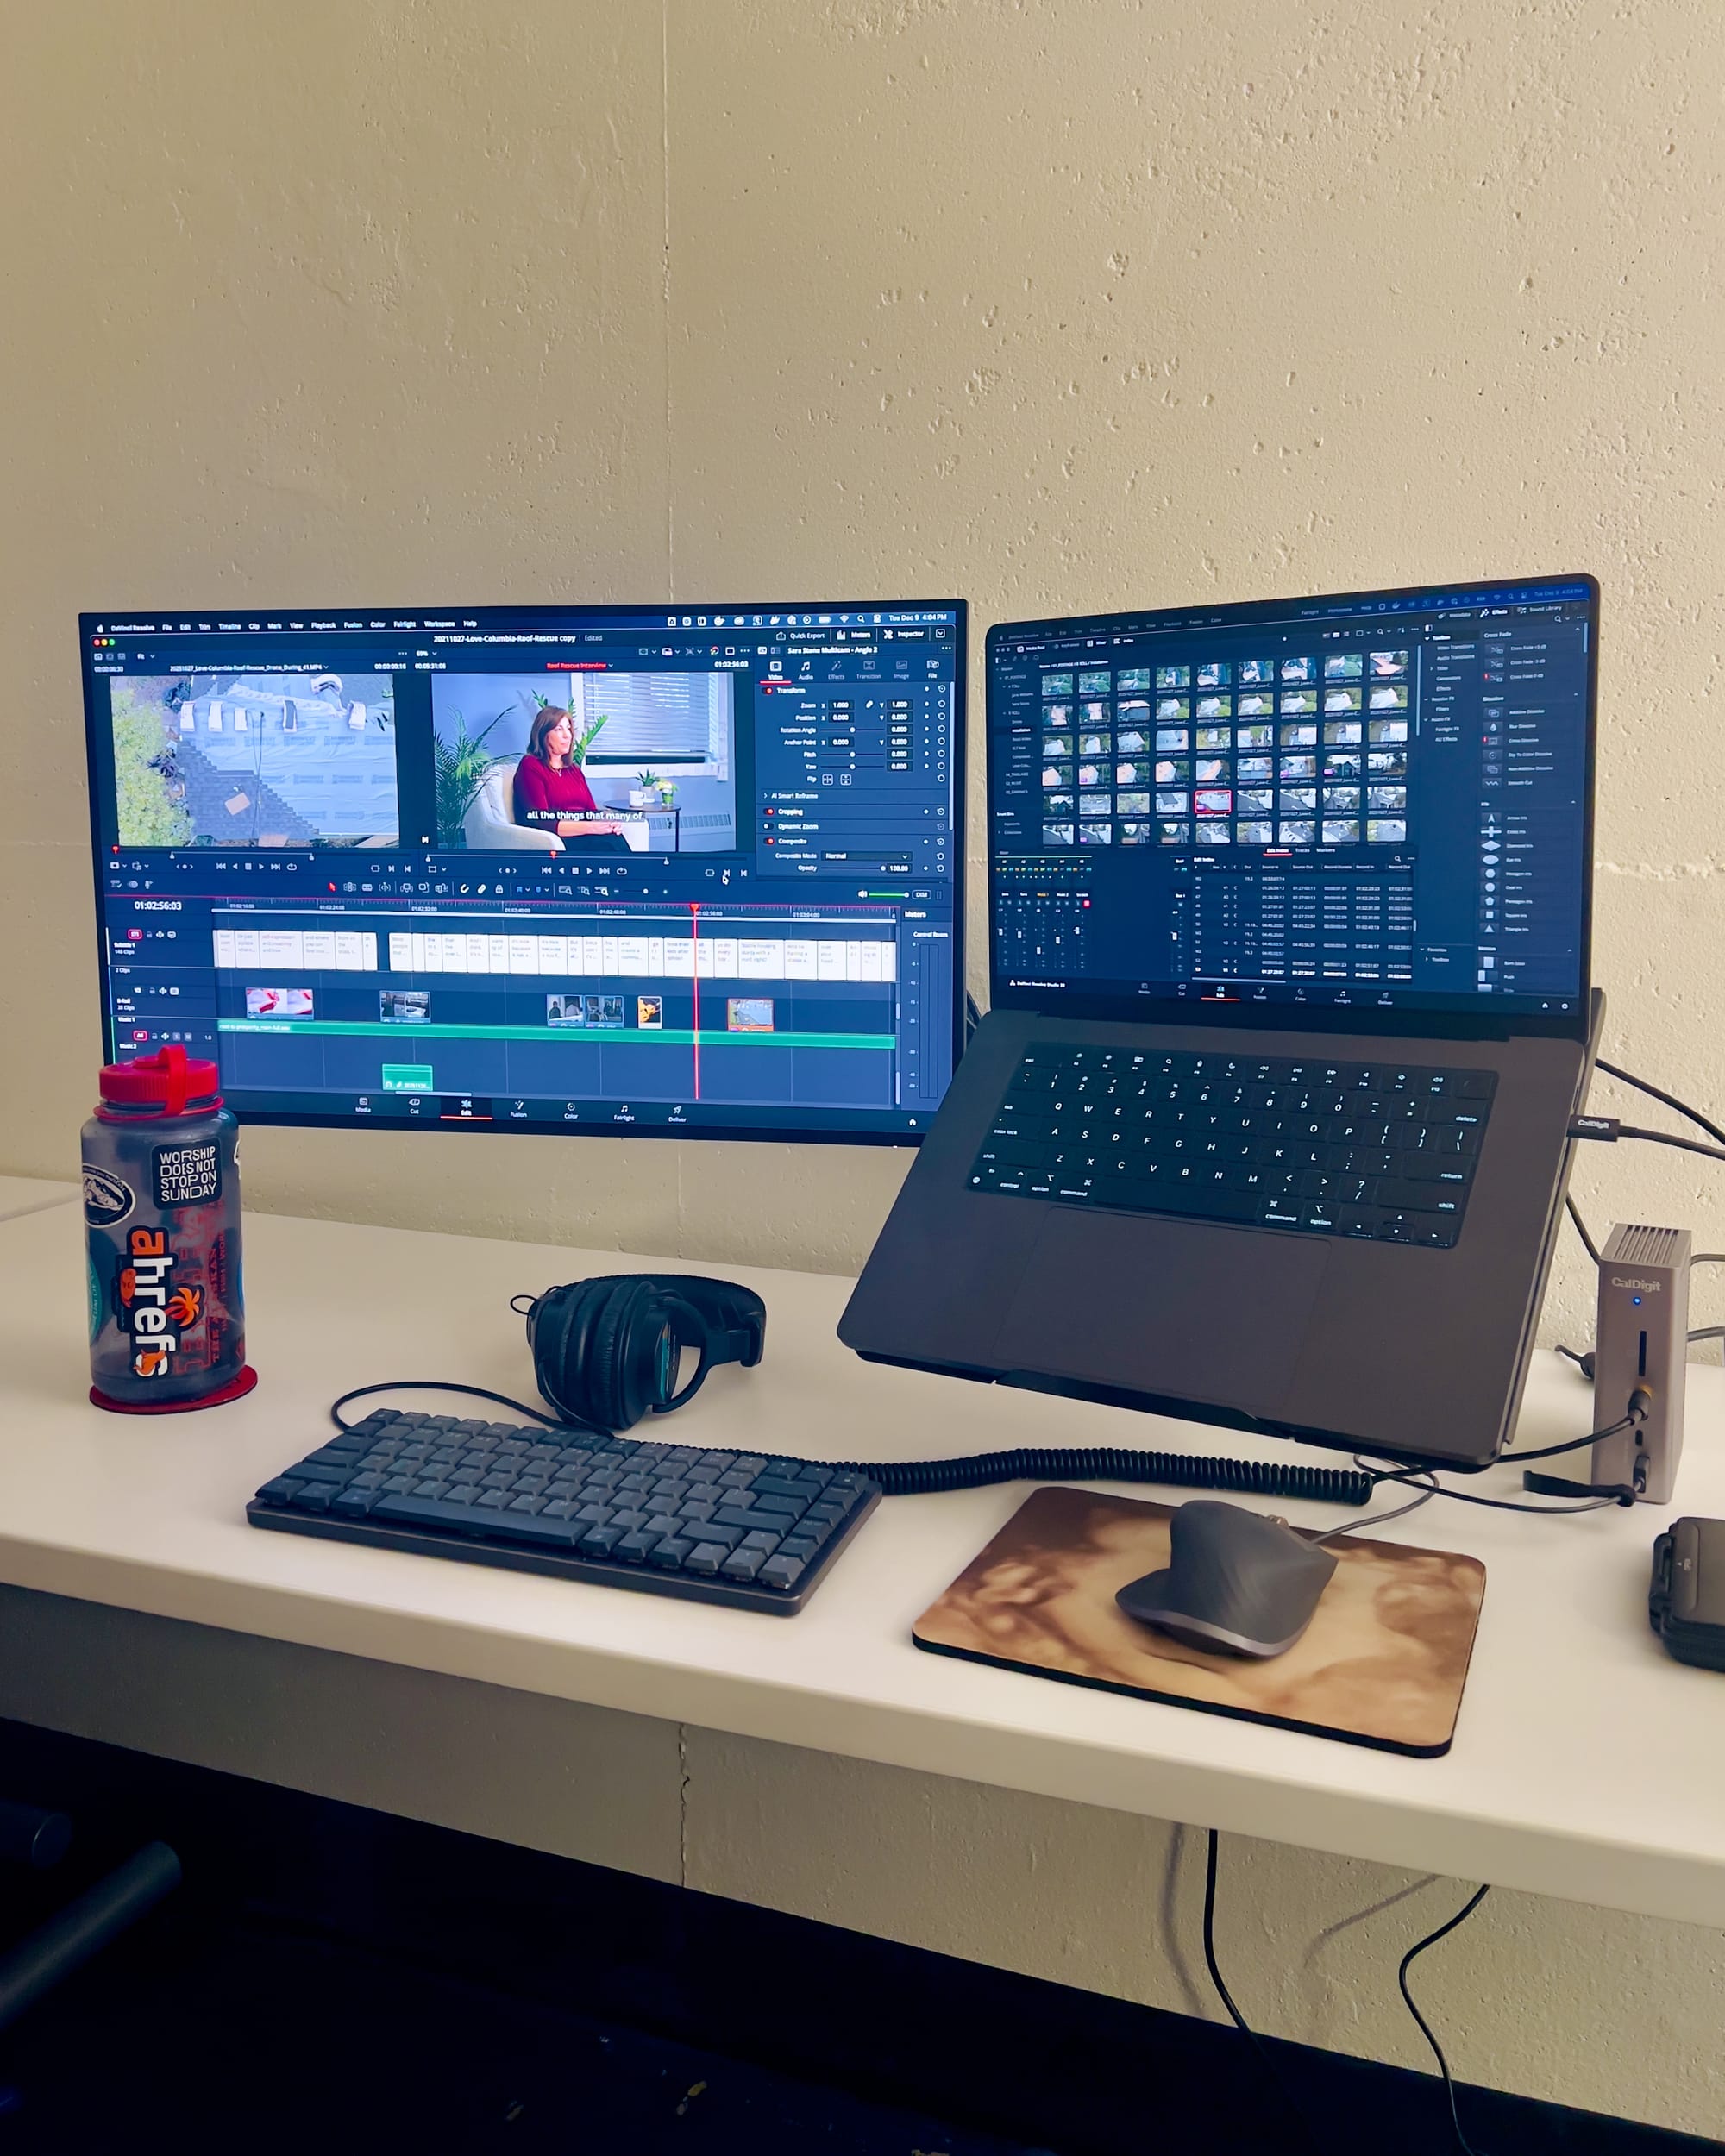
From a layout perspective, Resolve feels very simple and logical in comparison to Premiere. Now that I have a sense of my way around the program, I feel like Resolve does a good job of making key actions accessible without cluttering up the UI. Plus, it has the ability to use a dual screen view that pushes some windows to a secondary monitor to make the focus even more clear.
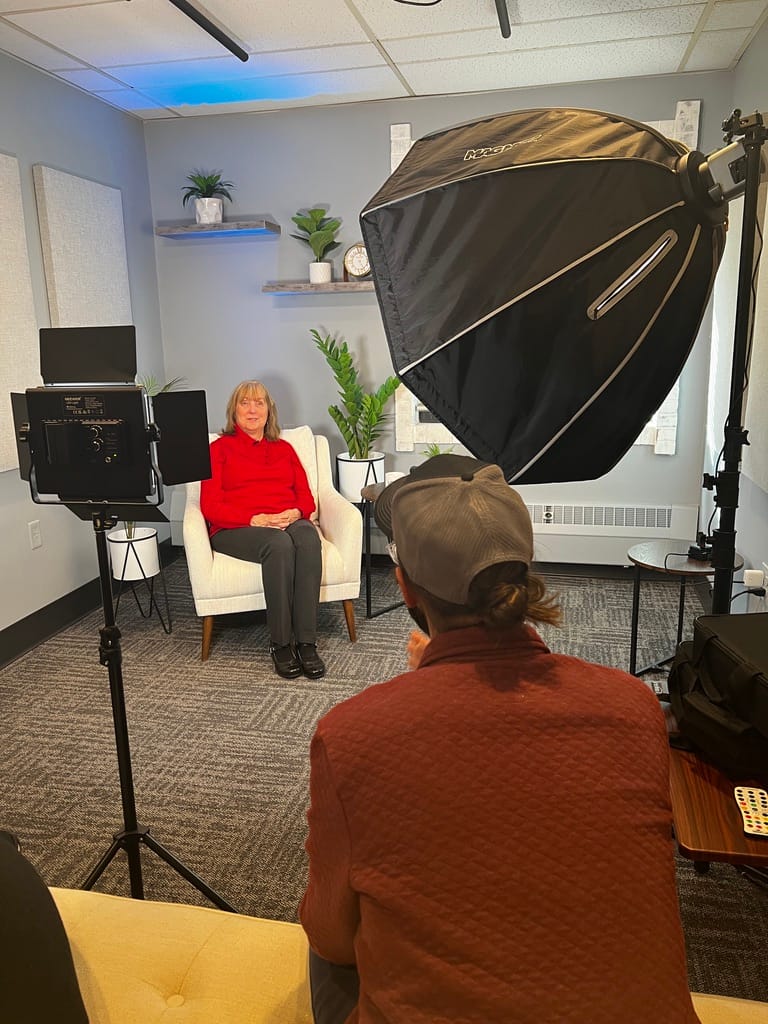

On set in the studio + capturing B-roll for the video.
I edited an entire multicam interview with two speakers in different sessions (for a total of four angles), drone B-roll, B-roll from different days/shoots, etc. in about two and a half weeks while working on other major projects and daily tasks.
That's everything from importing footage, cutting things on a timeline, color correction, sound mastering, and prepping things for final delivery. All that also while watching YouTube videos and consulting the manual to get up to speed. The point is that it's relatively easy to pick up if you’ve worked with another non-linear editor like Premiere and done any sort of sound editing.
What I enjoyed the most about Resolve
It's challenging to describe what I liked most about Resolve because so many things I like aren't just features—they're more about how the software feels and how that affects the editing flow.
At the end of the day, Blackmagic Design is a hardware company that makes software that integrates directly with their hardware, so pretty much everything is designed to have a tactile interface. I think that keeps the software grounded in the real world of human interfaces. Plus, since Resolve is designed to integrate with specific broadcast hardware, it exists in a whole ecosystem designed for demanding live production, which means the software has to hold up under aggressive, fast-paced workflows.
Here are the things I ended up liking the most about Resolve (in no particular order)
Simplified UI and Dual Screen display
In contrast to Premiere’s dozen or so workspaces, Resolve has seven (and they're all accessible from a menu at the bottom of the screen):
- Media: for managing media (replaces Hedge/Shotput Pro)
- Cut: for assembiling rough cuts of footage
- Edit: for fine-tuning the edits
- Fusion: for VFX work and motion graphics (replaces Adobe After Effect)
- Fairlight: for audio editing/mixing/mastering (replaces Adobe Audition)
- Deliver: for exporting
Having access to all of these workspaces at the bottom of the screen makes it easy to switch between workspaces. Whereas Premiere puts the workspace in a menu that you have to click on, Resolve put all of the main workspace in an accessible place, which just feels better.
And when you're in a workspace, it feels like more tools are accessible where you'd want them to be. You might have to watch a YouTube video to find where the tool is, but once you do, it just makes sense.
The Dual Screen workflow is nice because it pushes some interface items to a secondary monitor, which gives you even more room to focus on the task on hand.
Blackmagic Design publishes a whopper 4000+ page PDF manual of the program

The manual literally tells you how to do almost everything in the program. It's easy to search, and using it as a first source of info saves a lot of time vs. scouring YouTube for answers in a lot of cases. As a caveat, it would be nice if it was converted into a wiki/knowledge base format. However, I liked being able to save the whole thing to Zotero and search the full text.
Node-based editing for color correction and color grading
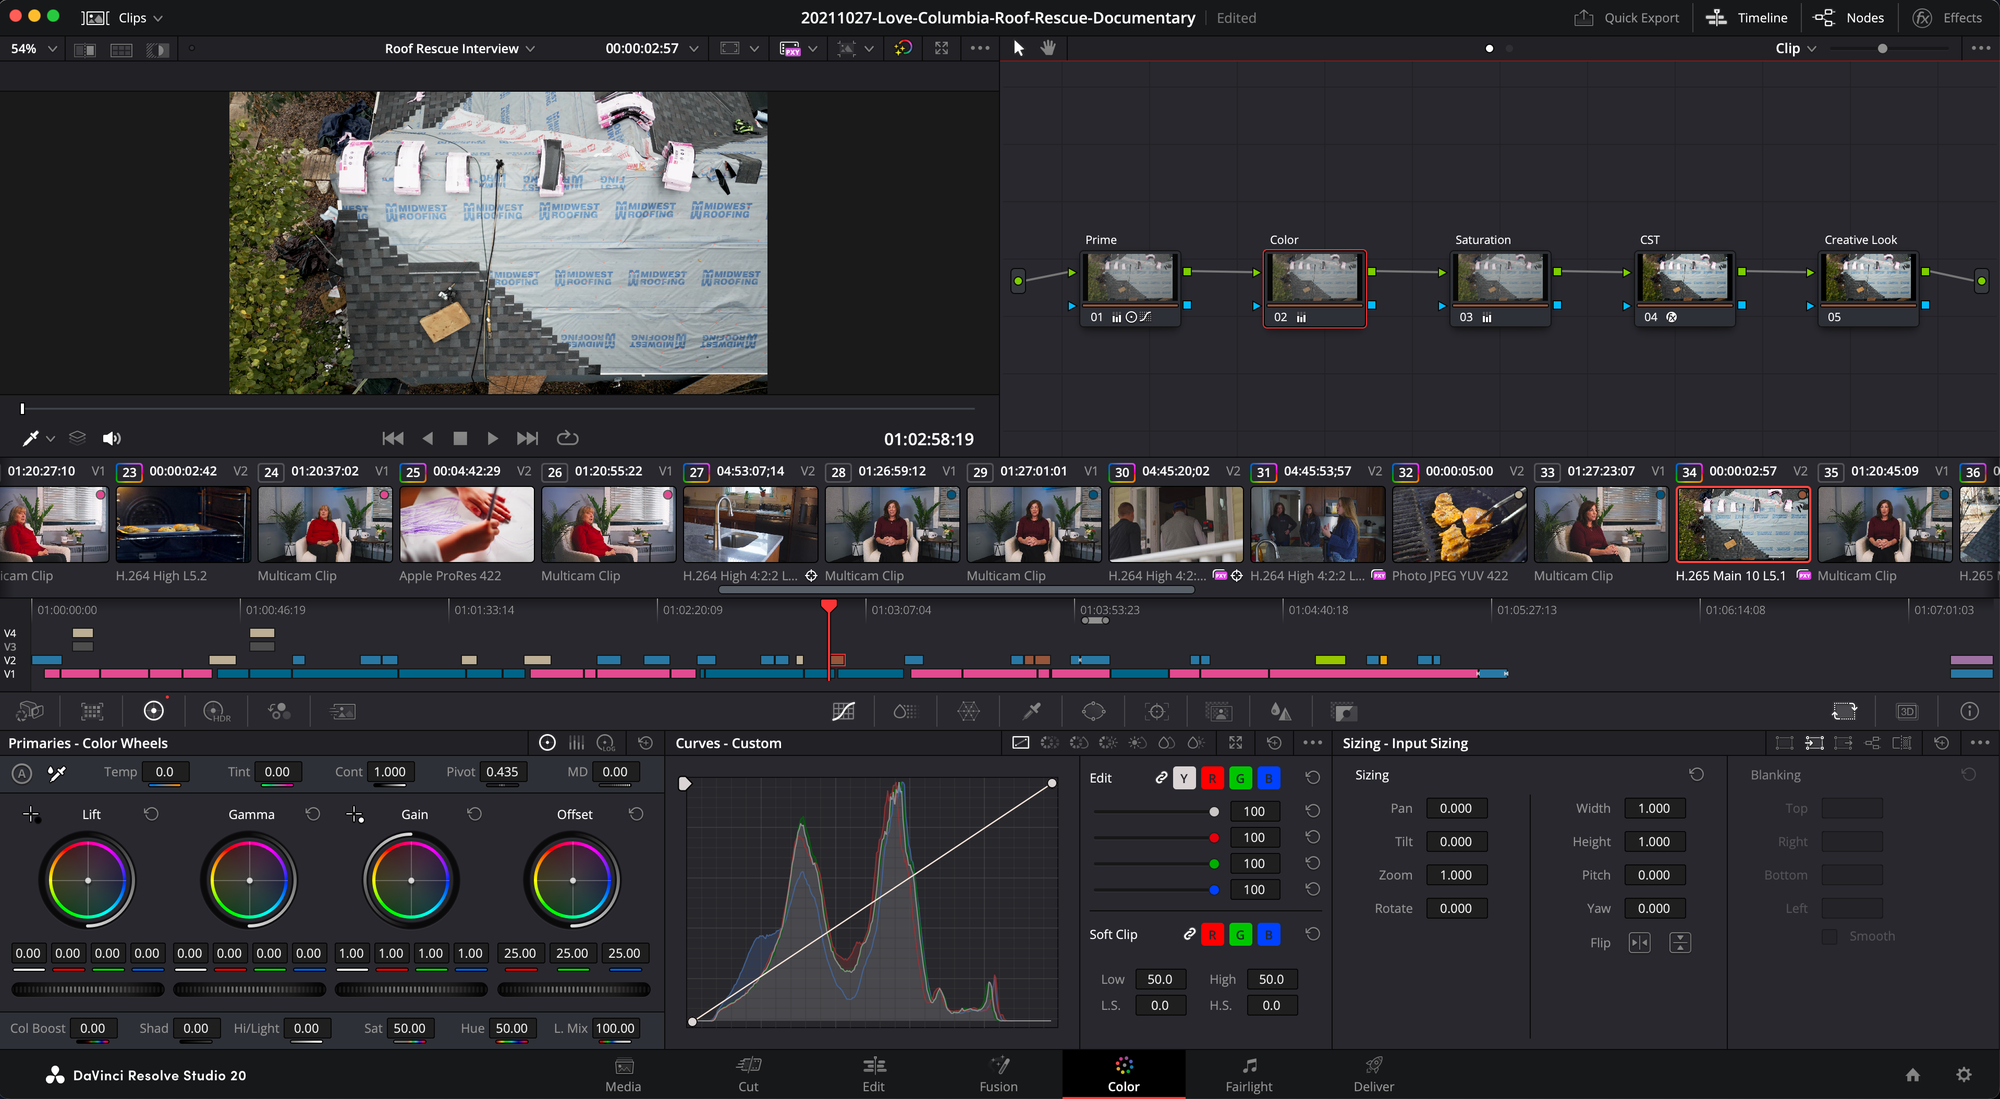
It took a bit for me to wrap my head around nodes, but the idea is that each node performs a specific function like adjusting exposure, contrast, color, applying a LUT, etc. This approach allows you to push the image much harder without breaking it, whereas all exposure color adjustments in Premiere are done at the same time through Lumetri Color. You gain a lot of fine control over the image with nodes and the ability to see how specific adjustments are affecting the image by turning individual nodes on/off.
The transcription cutting feature feels way cleaner
For the first interview I cut in Resolve, I prepped all of the interview questions, and conducted the interviews, so I had a good idea immediately after filming what lines I wanted in the video. The AI transcription did a very good job, and it was very easy to drop the right cuts into my timeline just by highlighting the sentences I like and pressing F10. Premiere may have an equivalent workflow, but I had not found it or learned it, even though I've used it's version of Text-based Editing. The simplicity of Resolve's approach enabled me to assemble a rough cut of the overall video flow very extremely fast.
Built in file transfer and checksums
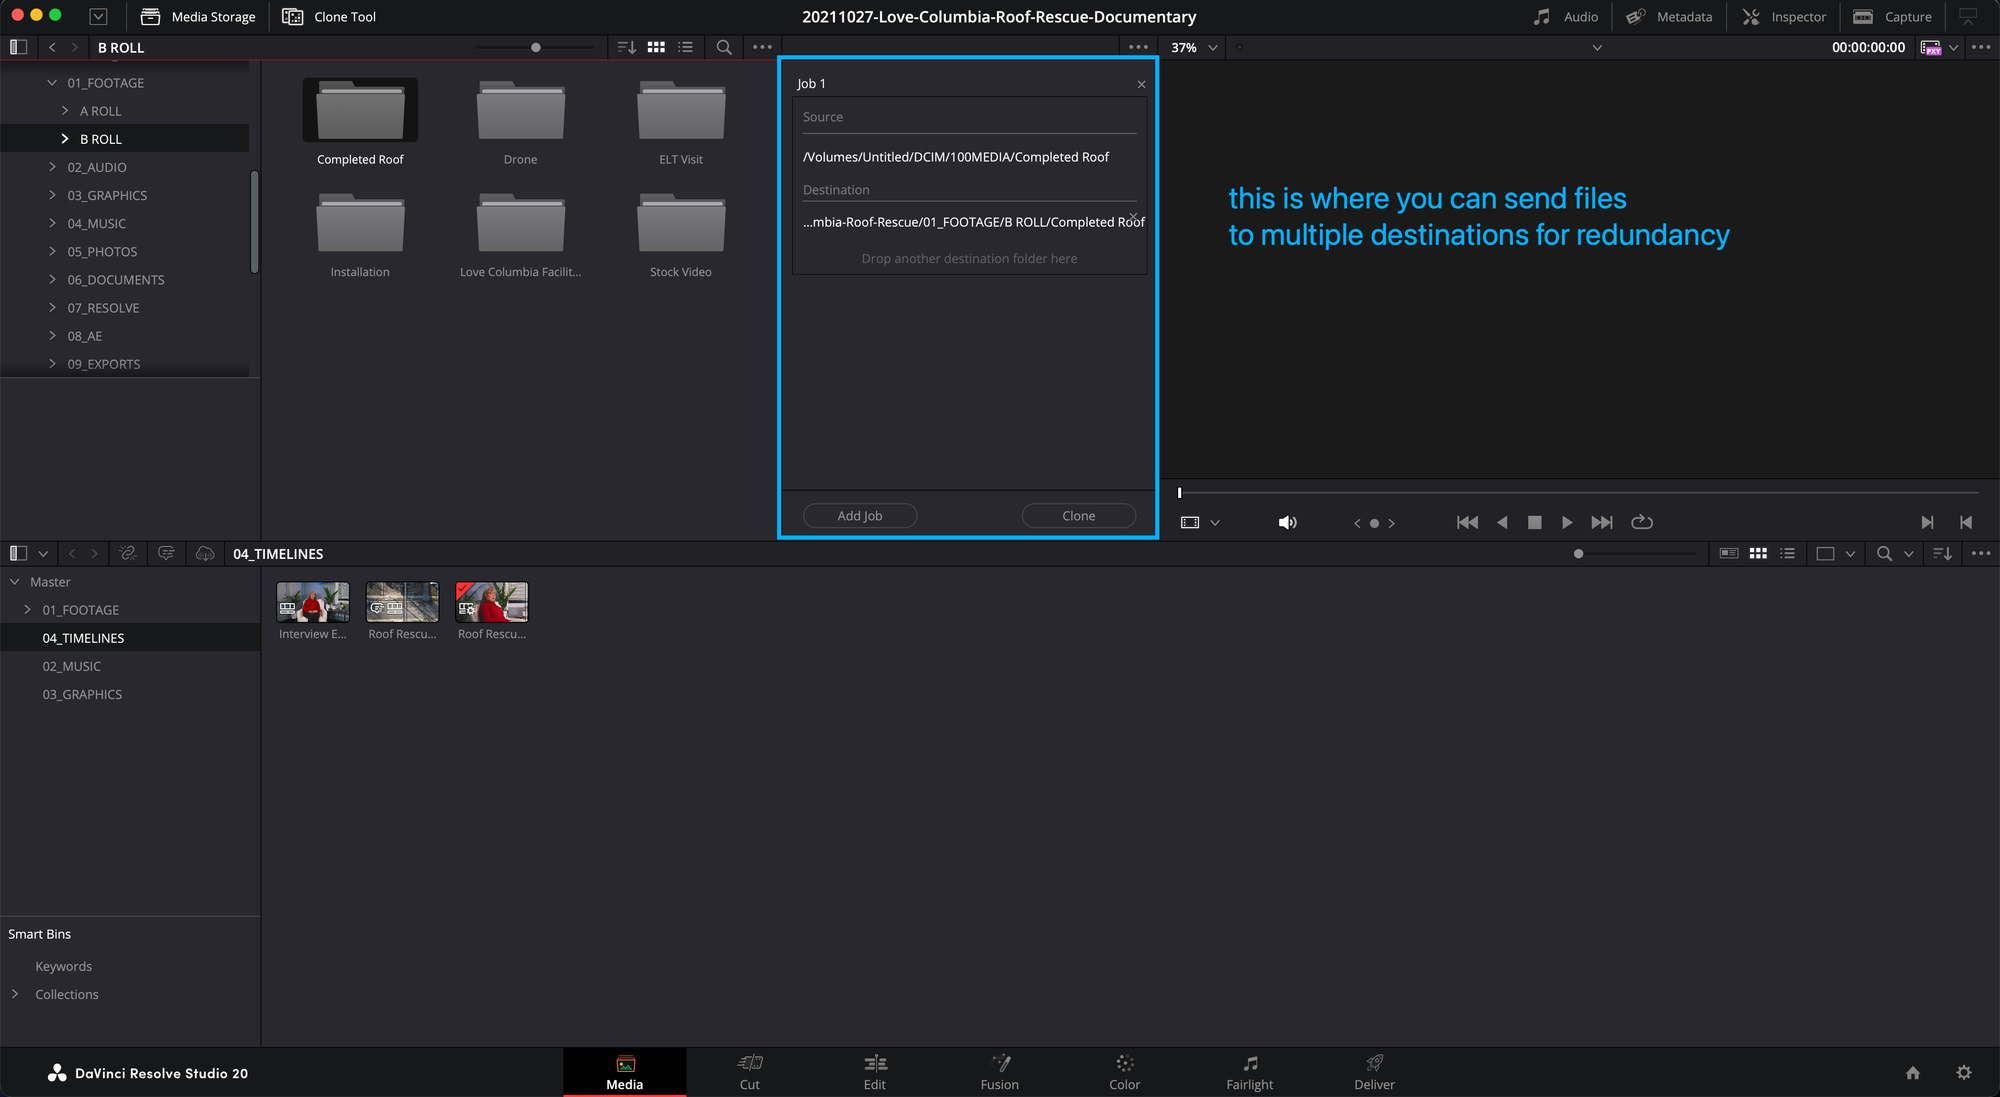
The Media page gives you what you need to manage files in a robust manner.
As mentioned previously, Resolve has ability to transfer files from an SD card or a hard drive to multiple locations and perform checksum verification. Having that capability directly in Resolve means that I can use one program for the entire post production workflow from ingest to delivery. Cutting even one additional program out of the workflow feels good.
Easy access to Ken Burns effects in the Cut page
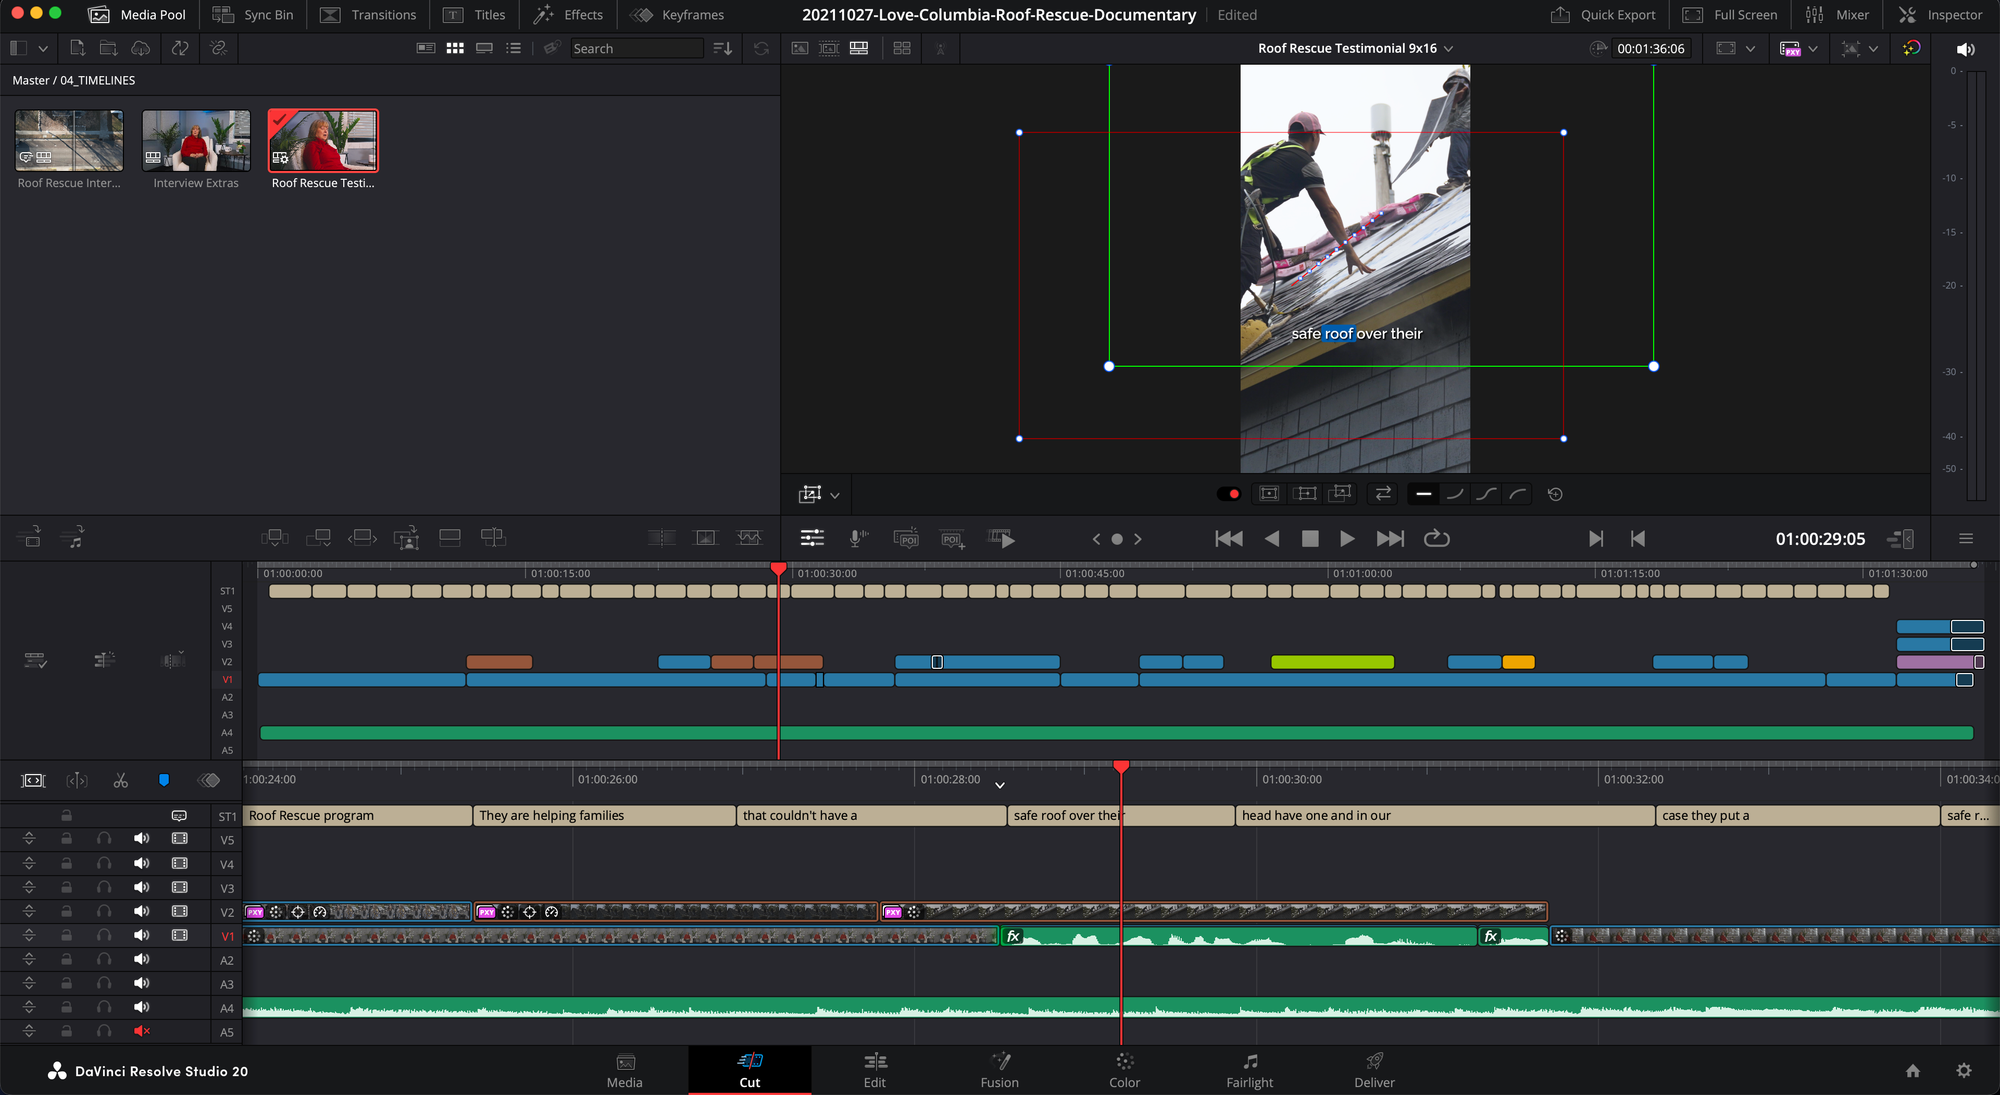
I've done some Ken Burns stuff in Premiere, and it's a pain. You have to do all this keyframe nonsense just to make a simple pan on an image. Resolve makes it simple with Dynamic Zoom. You can add zoom and pan effects very quickly, which is super useful when reformatting 16:9 widescreen to 9:16 vertical.
Conversion to vertical video feels more straightforward
If you're going to cut any video, you're likely going to have to create some vertical clips for social media. The faster you can turn those clips, the better.
I've tried Auto-Reframe in Premiere several times, and the results were always disappointing and required lots of manual rework. Resolve does things different. It just crops the video and makes the assumption that you'll want to move things around anyway, which I prefer because I don't really like computers assuming they know what I want.
Not having to go in and delete the Auto Reframe effect from a dozen plus clips is a huge quality of life improvement. And when paired with Dynamic Zoom, editing social videos from a long cut has never been easier for me.
One-click proxies
As I got deeper in the edit, I encountered some places where I finally had to come to terms with creating proxies, and it turns out that Resolve can do it on the fly whenever you need. All you have to do is click on a clip and tell it to create a proxy and everything happens in the background. It was so simple. Plus, you can toggle proxies on and off while viewing your footage. Everything is so clear and transparent.
No need for round-tripping from Premiere or to Audition or creating things in After Effects
You can do everything you need in one program. What could be simpler than that?
I've tried pushing things from Premiere to Audition to clean up sound and the process was always confusing no matter how much research I did. I know there are many people who round-trip their footage from Premiere to Resolve and back again for editing, color correction, and export, respectively, but why do any of that when you could keep everything in one spot?
As for VFX and motion graphics, you can do a lot of cool stuff in Fusion. I'm not experienced in animation or VFX, and the most complex work I'll probably do is adding in cool titles, lower thirds, and maybe a logo sting, and Fusion is more than capable of those things. Again, why deal with a second or third application when you can keep the project rolling in the same tool?
Final thoughts
This test run of DaVinci Resolve convinced me that:
- It's possible to switch.
- Everyone who says you should stick to Adobe Premiere because it's industry standard hasn't seen the grass on the other side of the fence.
- The alternative is better.
Overall, I'm very happy with the results and that I dove in head first to make the switch. If you're even slightly on the fence, I say "Go for it!" The grass is truly greener.
And if you want to take a look at the results I achieved in my first edit in Resolve, check out this video: